Introduction
Image Matting is the process of accurately estimating the foreground object in images and videos.
즉 이미지에서 전경 물체(foreground object)를 정확하게 추정하는 작업이다. 즉 익숙한 말로 '누끼 따는 작업'이다.
크로마키 영상이 아닌 일반영상(배경부분의 색이 단일색이 아닌경우)에는 누끼를 따는 작업을 편집툴 (프리미어프로, 다빈치리졸브 등)에서 지원을 어느정도 해주긴 하지만, 성능이 그렇게 좋지는 않다.
정교한 누끼를 위해서는 사람이 직접 작업을 진행해야하지만 60프레임 영상길이가 3분만 되어도 10800프레임이고 여러명의 영상을 누끼를 따려면 * 영상갯수만큼 늘어나게 되는데, 이걸 일일이 수작업으로 따는것은 말이 안되는 짓이다.(불가능하지는 않지만 그렇게까지..?)
본 글에서는 누끼 작업을 딥러닝을 이용해 추출해보도록 한다.
Motivation
개인적인 취미로 반응 영상을 편집하고 있는데 영상을 여러개를 합치는 작업을 하다보니 캐릭터 아바타가 다음 그림처럼 기본영상 위에 아바타+배경이 어느정도 들어가게 된다.
아바타만 추가되면 기본영상에 위화감이 적을것으로 생각되는데, 아바타 + 아바타의 배경영상까지 들어가서 화면이 매우 조잡(?)하게 느껴진다.
사실 캐릭터 아바타가 실시간으로 움직이는 영상 말고 단순 이미지로 입력하면 누끼따는게 훨씬 편하긴 한데, 실시간 움직임 반응이 보고싶어서 만드는 영상이라 이미지만 넣으면 의미가 없을것으로 생각된다.
그래서 아바타 영상에서 모든 프레임에 대해 아바타 누끼를 따서 원본 영상에 추가하는 방식을 시도해보기로 했다.

Method
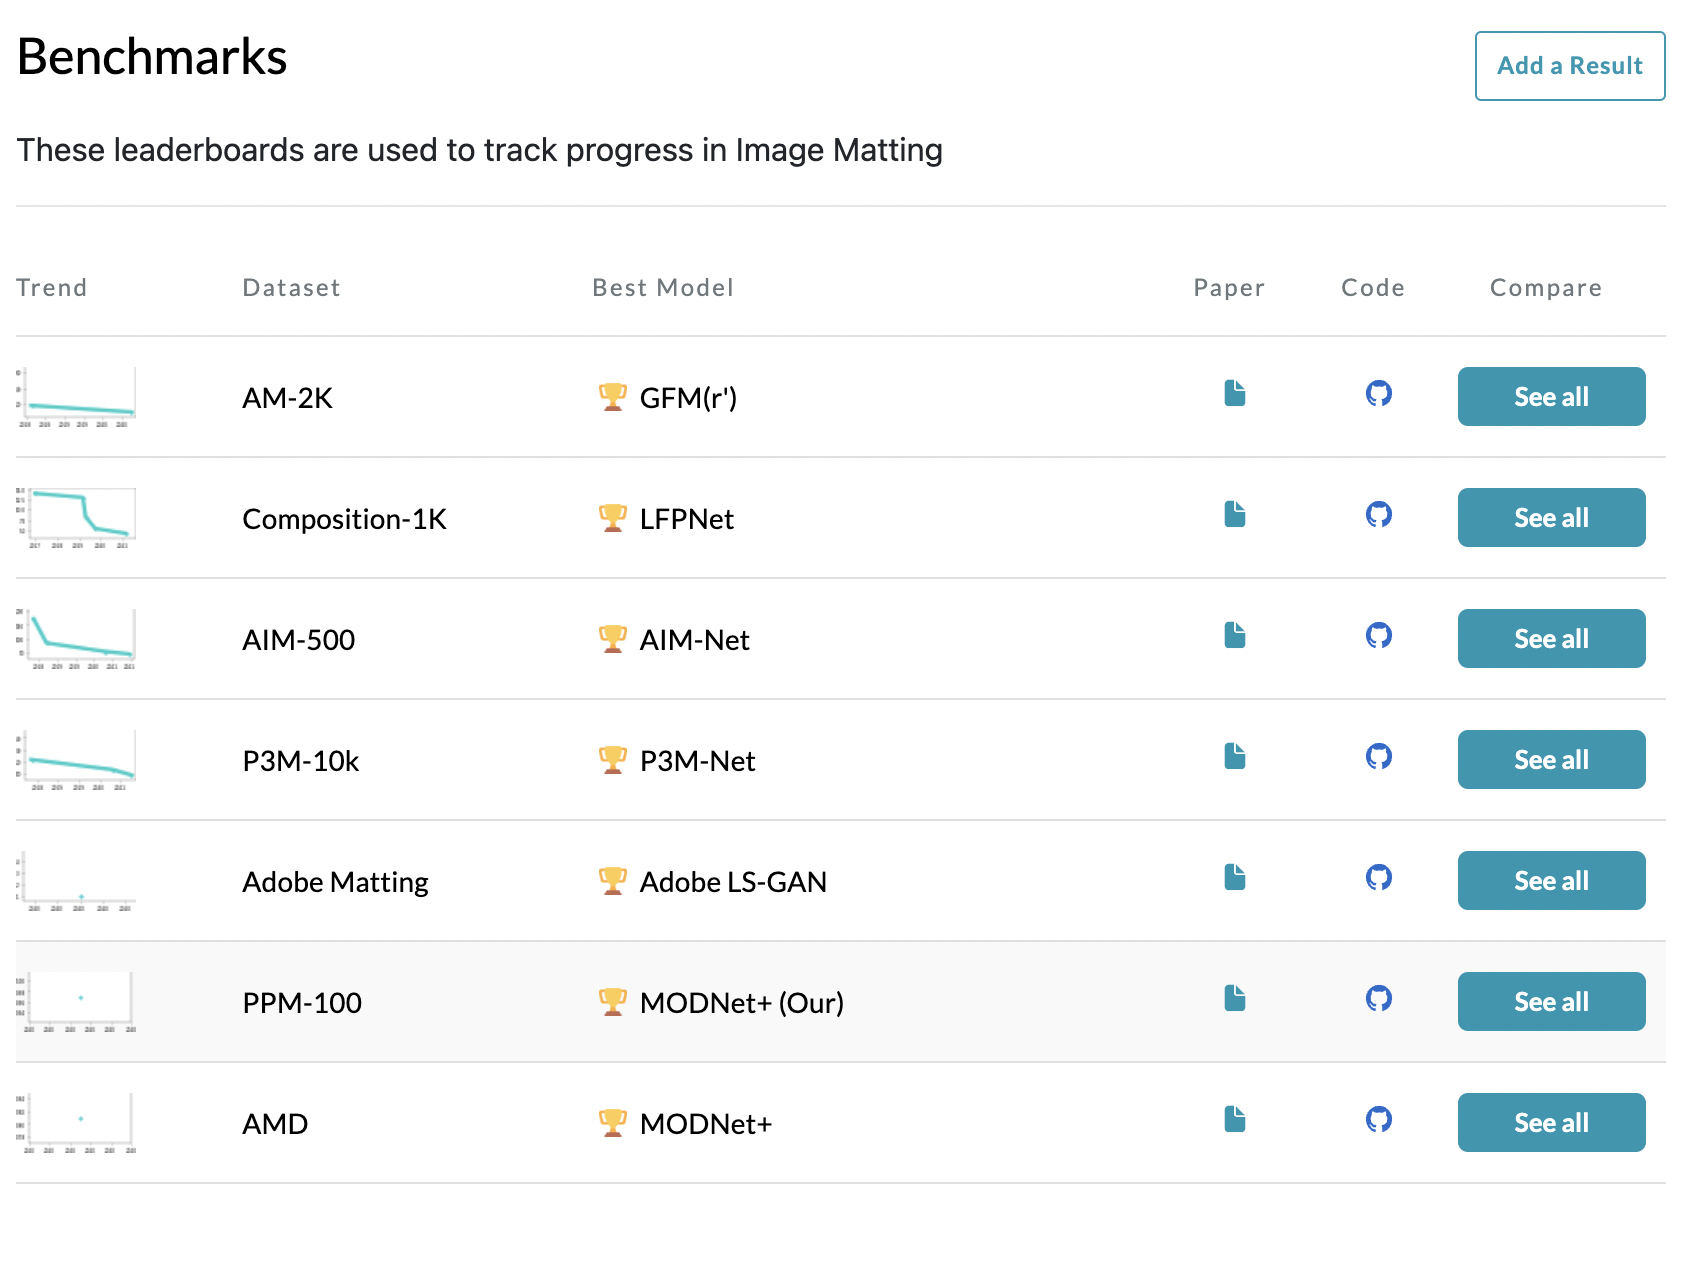
Image matting분야에서 SOTA(State Of The Art)알고리즘에 대해 찾아 봤는데, 데이터셋의 갯수는 많은데 모델의 갯수는 생각보다 적었다.
여러 모델 중 pre-trained weight를 제공해주면서 github에 정리가 잘 되어있고 가지고 있는 영상에 바로 적용해볼 수 있는 모델 2개(GFM, MODNet)를 택해서 실험을 진행해봤다.
GFM
GitHub - JizhiziLi/GFM: [IJCV 2022] Bridging Composite and Real: Towards End-to-end Deep Image Matting
[IJCV 2022] Bridging Composite and Real: Towards End-to-end Deep Image Matting - GitHub - JizhiziLi/GFM: [IJCV 2022] Bridging Composite and Real: Towards End-to-end Deep Image Matting
github.com
MODNet
GitHub - ZHKKKe/MODNet: A Trimap-Free Portrait Matting Solution in Real Time [AAAI 2022]
A Trimap-Free Portrait Matting Solution in Real Time [AAAI 2022] - GitHub - ZHKKKe/MODNet: A Trimap-Free Portrait Matting Solution in Real Time [AAAI 2022]
github.com
MODNet Inference.py의 내용을 가지고있는 데이터셋 및 이미지 파일 경로에 맞게 수정해서 추론을 진행했다.
def run(input_path,output_path):
    input_path = input_path
    output_path = output_path
    ckpt_path = '/home/jini1114/git/isedol_segmentation/pretrained/modnet_photographic_portrait_matting.ckpt'

    # define hyper-parameters
    ref_size = 512

    # define image to tensor transform
    im_transform = transforms.Compose(
        [
            transforms.ToTensor(),
            transforms.Normalize((0.5, 0.5, 0.5), (0.5, 0.5, 0.5))
        ]
    )

    # create MODNet and load the pre-trained ckpt
    modnet = MODNet(backbone_pretrained=False)
    modnet = nn.DataParallel(modnet)

    if torch.cuda.is_available():
        modnet = modnet.cuda()
        weights = torch.load(ckpt_path)
    else:
        weights = torch.load(ckpt_path, map_location=torch.device('cpu'))
    modnet.load_state_dict(weights)
    modnet.eval()

    # inference images
    im_names = os.listdir(input_path)
    for j in tqdm(range(len(im_names)),desc = 'image to matte'):
        #print('Process image: {0}'.format(im_name))
        im_name = im_names[j]
        # read image
        im = Image.open(os.path.join(input_path, im_name))

        # unify image channels to 3
        im = np.asarray(im)
        if len(im.shape) == 2:
            im = im[:, :, None]
        if im.shape[2] == 1:
            im = np.repeat(im, 3, axis=2)
        elif im.shape[2] == 4:
            im = im[:, :, 0:3]

        # convert image to PyTorch tensor
        im = Image.fromarray(im)
        im = im_transform(im)

        # add mini-batch dim
        im = im[None, :, :, :]

        # resize image for input
        im_b, im_c, im_h, im_w = im.shape
        if max(im_h, im_w) < ref_size or min(im_h, im_w) > ref_size:
            if im_w >= im_h:
                im_rh = ref_size
                im_rw = int(im_w / im_h * ref_size)
            elif im_w < im_h:
                im_rw = ref_size
                im_rh = int(im_h / im_w * ref_size)
        else:
            im_rh = im_h
            im_rw = im_w

        im_rw = im_rw - im_rw % 32
        im_rh = im_rh - im_rh % 32
        im = F.interpolate(im, size=(im_rh, im_rw), mode='area')

        # inference
        _, _, matte = modnet(im.cuda() if torch.cuda.is_available() else im, True)

        # resize and save matte
        matte = F.interpolate(matte, size=(im_h, im_w), mode='area')
        matte = matte[0][0].data.cpu().numpy()
        matte_name = im_name.split('.')[0] + '.png'
        Image.fromarray(((matte * 255).astype('uint8')), mode='L').save(os.path.join(output_path, matte_name))

def get_args():

	parser = argparse.ArgumentParser(description='Arguments for the testing purpose.')
	parser.add_argument('--ori_dir', type=str, required=True)
	parser.add_argument('--file_name', type=str, required=True)
	parser.add_argument('--jpg_dir', type=str,required=True)
	parser.add_argument('--seg_dir', type=str,required=True)
	parser.add_argument('--png_dir', type=str, required=True)
	args = parser.parse_args()
	return args

args = get_args()

file_name = args.file_name
file_names = file_name.split('/')
origin_file_name = file_names[-1]

ori_dir = args.ori_dir
jpg_dir = os.path.join(args.jpg_dir,origin_file_name)
png_dir = os.path.join(args.png_dir,origin_file_name)
seg_dir = os.path.join(args.seg_dir,origin_file_name)

if not(os.path.exists(jpg_dir)) :
    os.system('mkdir -p ' + jpg_dir)
print(origin_file_name,'start')
if not(os.path.exists(png_dir)) :
    os.system('mkdir -p ' + png_dir)
cap = cv2.VideoCapture(os.path.join(ori_dir,origin_file_name))
count = 0
while True :

    if (count%1000 == 0):
        print(count)
    ret, frame = cap.read()

    if ret == False :
        break

    if origin_file_name[0] == 'l' :
        cv2.imwrite(os.path.join(jpg_dir,'%d.jpg'%(count)),frame[400:,:800,:])
    if origin_file_name[0] == 'r' :
        cv2.imwrite(os.path.join(jpg_dir,'%d.jpg'%(count)),frame[400:,1200:,:])
    count+=1
run(jpg_dir,png_dir)
Results
우선 비챤님 영상 하나에 대해 여러가지 실험을 진행해서 최적의 방법을 찾았다.
GFM모델과 MODNet 모델 각각을 실험 했을떄, MODNet이 월등하게 아바타를 잘 추출하는것을 확인할 수 있었다.
마지막으로 MODNet without threshold를 이용해서 나머지 아바타들의 누끼를 따서 사이언티스트 반응 영상을 합쳐봤다.
하단부만 비교해봤을때 원본영상이 보이는 영역이 더 많기 때문에 좀 더 깔끔해 보인다.

아이네님, 징버거님, 비챤님은 아바타가 전체적으로 둥글둥글하고 경계가 명확해서 누끼가 깔끔하게 따지는 부분이 대체로 많지만,
세구님 후드티, 르르님 리본, 릴파님 포니테일은 누끼가 깔끔하게 따지지 않는 것을 확인할 수 있다.
Conclusion & Discussion
results에서 볼 수 있듯이, 누끼가 잘 따지는 경우도 있고, 완전 망가지는경우도 있다.
세구님 후드티 같은경우는 배경과의 경계가 모호한 색깔(약간 파스텔톤)이라 배경으로 인식되는것 같고, 르르님 리본의 경우도 배경으로 인식되는 경우가 많은 것 같다.
릴파님 포니테일의 경우는 본체(몸통)과 많이 떨어져있거나 팔랑거리는 경우가 많아서 인식이 잘 되지 않는 것 같다.
좀 더 명확한 누끼를 위해 MODNet을 통해서 mask GT Dataset을 대량 생산하고, 수작업으로 잘 추출된 matte만 선별하여 transfer learning에 이용할 데이터셋을 생성하는 작업을 진행할 것이다.
또한 matting 기법에 이어서, segmentation 기법도 사용해 단순히 배경에서 분리하는 것 뿐만 아니라 아바타가 있는부분만 추출하는 모델을 학습해 볼 것이다.
전체적인 학습 및 추론 코드는 제 깃헙에서 확인할 수 있으나, 배포용이 아니므로 정리가 되어있지 않습니다.
알잘딱으로 필요하신부분만 쓰시면 됩니다.
GitHub - wlsdml1114/isedol_segmentation
Contribute to wlsdml1114/isedol_segmentation development by creating an account on GitHub.
github.com
'인공지능 > Toy Projects' 카테고리의 다른 글
| 가수의 목소리 변경_1 (Singing Voice Conversion) (0) | 2022.05.09 |
|---|---|
| 노래에서 목소리와 악기소리 분리_完 (music demixing using mdx-net & MUSDB18 dataset) (0) | 2022.04.14 |
| 현실의 춤을 가상공간으로 매핑하기_관 (using 3D human pose estimation) (0) | 2022.04.13 |
| 현실의 춤을 가상공간으로 매핑하기_1 (using 3D human pose estimation) (0) | 2022.04.06 |
| python에서 Semantic segmentation을 이용한 누끼따기_完 (remove background, semantic segmentation using python) (0) | 2022.03.30 |


